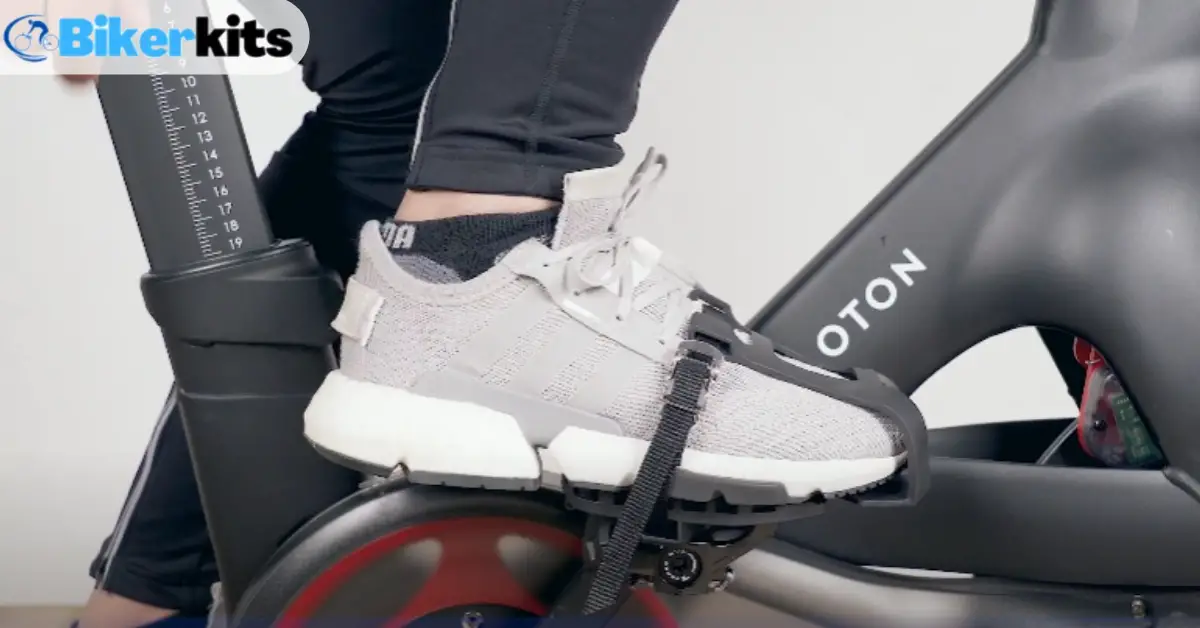
Toe clips or cages can be used with regular athletic shoes (the compatible ones) aside from peloton shoes. So, you can use toe cages to clip into your peloton bike pedals just like you can with peloton shoes. We think toe cages also give you stability for cycling.
Generally, toe cages come with laces or straps. They can also include cleats sometimes. Follow the steps below to set up toe cages correctly –
How to Set Up and Install Toe Cages?
Step 1 –
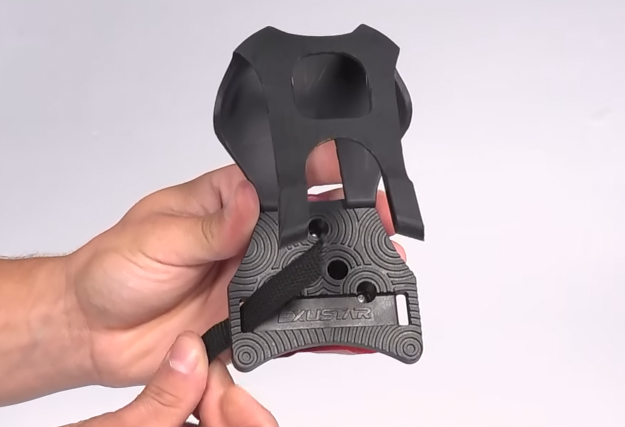
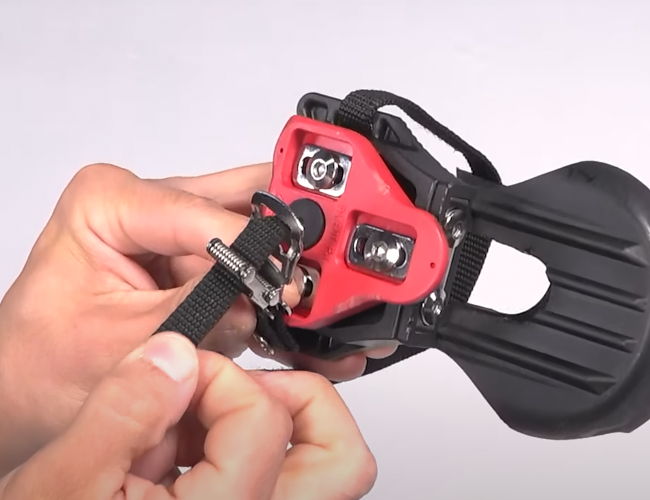
Start by grabbing one of the laces or straps and threading it through the bottom of the toe cage. It won’t matter if the toe cage is for the right foot or left foot. You just need to make sure the buckle remains facing downwards.
Step 2 –
On the top of the cage, you will notice 2 holes. Fold the strap over and tread it through these holes.
Step 3 –
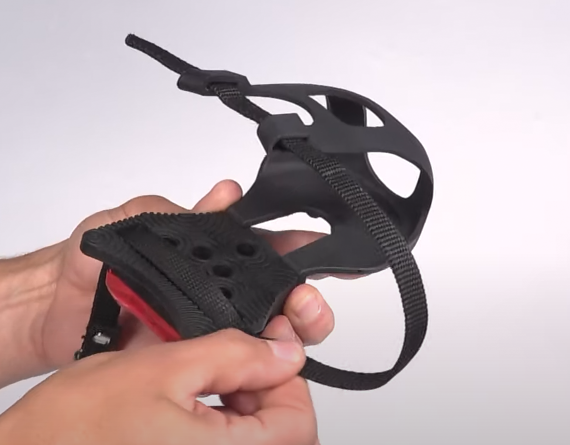
Pull the lace or strap all the way through so that the buckle comes close to the bottom of the toe clip or toe cage.
Step 4 –
Now, press the buckle to squeeze it open. Carefully, insert the free end of the strap under the roller and through the tooth opening.
Step 5 –
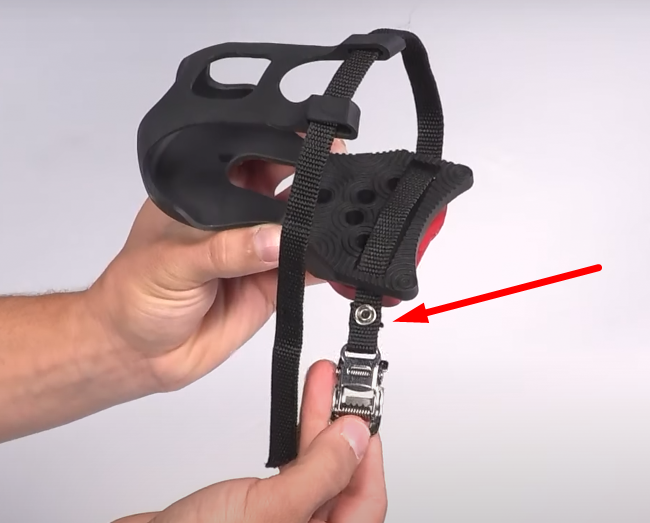
Repeat steps 1 to 4 for the other toe clip. But this time, you need to thread the strap from the opposite side of the clip. Also make sure, both the buckles are facing out when you are on the bike wearing the toe cages.
Step 6 –
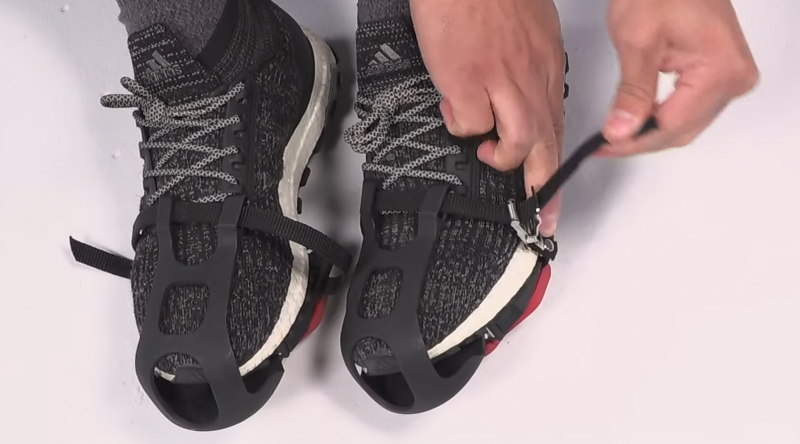
Insert your athletic shoes into the toe cages. For the left foot, the buckle should be positioned to the left side. And for the right foot, the buckle should be positioned to the right side.

Step 7 –
Now you need to tighten the toe cages to your shoes. Pull the straps or laces to adjust the tighten. Your feet should feel comfortable wearing them. At the same time, they should be snug enough to stay in your shoes. The toe cages shouldn’t be too tight or loose.
Hurray! You should have successfully set up peloton toe cages by now. If that’s not the case, don’t worry. Watching this video will clear your confusion –
| Note: We showed the general way to set up peloton toe cages. The installation process of toe cages may differ according to the model and pedal type. There are many types of toe cages available these days and they require different installation processes with straps and cleats. |
How to Install Peloton Toe Cages?
To properly install peloton toe cages, make sure the toe cages are properly clipped into the pedals. But before that, the cleats should either be installed or you need to install them on the toe cages first.
If there are no cleats pre-installed on the toe cages or if you want to install an aftermarket cleat, then let’s see how to install cleats on toe clips or toe cages first –
How To Install Cleats on Peloton Toe Cages?
The process is very similar to installation cleats on peloton shoes. A 4-millimeter hex key is needed for this installation. Let’s get down with the process –
- Match the screw holes and place the cleats on the bottom of the toe clips.
- After that, place the washers into the appropriate recess areas.
- Make sure the cleats are facing forward and inline between your toe and heel.
- Now, tighten the screws with a 4-millimeter hex key until you feel like the cleats are properly secured.
- Repeat the same process for the other toe cage. You will be good to go if you have done everything accordingly.
Once you have successfully installed the cleats under the toe cages, it’s time to clip them into the pedals.
How To Attach Toe Cages To Peloton?
You can clip the toe cages or clips into the pedals the way you would with your peloton shoes. Following these steps one-by-one will perfectly clip the toe cages into the pedals –
- Sit on the bike and spread your legs apart on each side of the bike.
- Keeping one foot on the ground, place the other onto the pedal. A 6 o’clock position is recommended for the pedal in which you are placing your foot.
- Adjust the cleat to the right position on the pedal. Now, push it downwards with your foot until you hear a creaking sound. It indicates the toe cage is clipped in.
- At this position, pull the strap to tighten and thread its free end through the other side of the buckle.
- Follow these steps for the other toe cage. It is better to ensure – the pedal is at the 12 o’clock position this time.
So far so good, right? Congrats! Because now you know how to install peloton toe cages properly.
How to Adjust Peloton Toe Cages?
Adjusting the toe cage means, whether it is tightened or loosen properly. We don’t think we need to elaborate on this subject as you will figure it out naturally with your instinct. There will be a metal catch on the buckle. You need to pinch it to make it open. Now, insert the loose end of the strap between the roller and the tooth.
Once you have placed your shoes into the toe clips, keep pulling the strap unless you feel it is tightened enough. And pressing down the buckle will automatically loosen the toe clip.
How to Unclip Peloton Toe Cages?
In this section, we will not only teach you how to unclip toe cages from the pedals but also how to remove them. You may need an Allen wrench and some pedal oil for this. We need your attention for this and want you to follow these steps accordingly –
- While you are sitting on your bike, either hold down the handle or resistance knob (for peloton bikes) and kick your heels away applying moderate pressure. This will instantly unclip the toe clips from the pedals.
- To remove the toe cages, you need to remove your shoes from them. Press down the buckle to loosen it and slip your foot out of the toe cage. This will leave the toe clips attached to the pedals.
- While you are off your bike, slowly pull off the straps from the loops of the clips. This particular step is required only if the toe cages come with straps. Not all toe cages require straps to adjust them effectively. For those cases, this step can be ignored.
- If your pedals happen to use bolts to fix the toe cages, then you need to find them. By turning the pedals over, you will notice the shiny bolts attached to the toe clips. However, not all pedals use bolts for fixing the clips. For instance, peloton pedals or clipless pedals don’t require any bolt to install toe cages.
- Now it’s time to unbolt the bolts. An Allen wrench can be used for this. Unbolting the bolts can be harder than you expect if you have used the toe cages for a long time. If that is the scenario, use pedal oil to soften the grip.
- To loosen the bolts, turn them counterclockwise. Use your hands to accelerate the process once the bolts are loosened completely and start to come off.
- Now, you can remove the toe cages from the pedals. The process would be much easier if no bolts are required to attach the toe cages with the pedals.
The whole process has shown you how to unclip and remove toe cages from the pedals. We hope you have understood each step. Leave a comment if you have any queries regarding any step. We would be glad to assist you.
Final Words
When you have to be on and off your Peloton or spinning bike in between the riding sessions, an uncomfortable toe cage can feel like a curse.
Having the proper installation and adjustment of peloton toe cages makes sure that you and your family use peloton comfortably and also save the extra money.